Writing with Alcohol Based Highlighters and Markers
Experiment number : 1772
Goal of experiment
The experiment shows that we can meet the cooling effect accompanying the evaporation of liquids when writing with markers (highlighters) or printing with an inkjet printer.
Theory
Highlighters, or markers in general, are based on the application of ink through a porous sponge tip. In the past, the volatile component of ink was aromatic hydrocarbons such as toluene or xylene; current inks are based on alcohol, such as 1-propanol, 1-butanol or cresols.
After application on paper, the alcohol component of ink rapidly evaporates, causing a local decrease in temperature at the place of application.
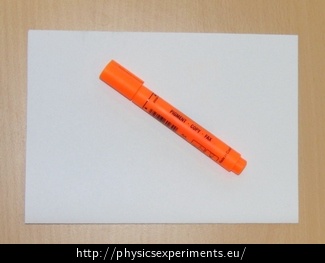
Tools (Fig. 1)
Thermal imaging camera, paper, highlighter or other marker.
Procedure
Draw a shape (curve, letter...) on a paper and observe it with a thermal imaging camera.
Sample result
A successful experiment is illustrated in video no. 1 below. In the places where the highlighter touched the paper, local temperature decrease occurs due to evaporation.
In preparing this video, thermal imaging camera FLIR i7 was used. The temperature range of colour scheme was chosen in the interval from 25 °C to 32 °C, emissivity was ε = 0.95.
Technical notes
Do not put your hand on the paper when performing this experiment – it would create a warm spot on the paper, which would ruin the demonstrated effect.
The experiment can also be performed using water-based markers; the cooling effect is however less distinctive.
Alternatively performed experiment using inkjet printer
An analogous experiment can be performed with an inkjet printer. The printer covers the printed paper with a layer of liquid – ink with a corresponding colour. The portion of ink which is not absorbed by the paper evaporates after printing the same way as with the evaporation of alcohol in the experiment above. This causes a local temperature decrease. Figures 2 and 3 show a freshly printed page seen by a digital camera and by thermal imaging camera.


Experiment with the printer must be carried out immediately after the page is printed; it is generally preferable to choose a pattern with larger print area (not small text with normal size of 12 points) and set the printer to maximum print quality – both of these measures will increase the amount of ink that can evaporate.


