Heat Dissipation Through a Copper Spiral
Experiment number : 1946
Goal of experiment
We will demonstrate the cooling of a flame caused by inserting a copper spiral into the flame.
Theory
Copper is a very good heat conductor. In other words, it is able to quickly equalize temperature differences. If we put a spiral made out of copper into a candle flame, which usually burns at 700 °C to 800 °C, the spiral begins dissipating heat from the flame into its volume – the flame therefore loses a part of its internal energy and decreases in temperature. This decrease in temperature causes the flame to darken or even completely fade.
It is possible to arrange the experiment in such a way that the flame does not go out; however, the temperature of the spiral must then be comparable to or even greater than the temperature of the flame. Then we minimize the heat dissipation from the flame through the spiral. We can even achieve the opposite effect, where heat goes from the spiral to the flame: then we do not observe any noticeable changes in its shape or temperature.
Tools
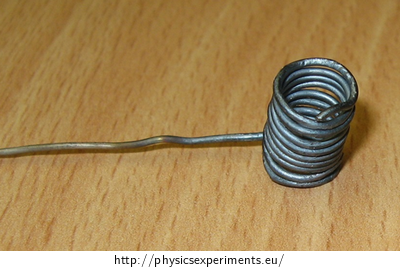
Copper wire wound into a spiral (see Fig. 1), candle, safety matches, pliers, gas burner.

Procedure
First part of the experiment
We light the candle and put the wound spiral into the pliers.
We carefully put the spiral onto the flame and keep it there for a few seconds. The copper quickly transfers heat from the flame into its volume and the flame almost goes out.
Second part of the experiment
Now we repeat the experiment, but this time we preheat the spiral with the gas burner.
We wait until the spiral glows red and then we put it into the flame the same way we did in the first part. In this case, the flame will not drastically change its intensity.
Sample result
The course of both parts of the experiment is depicted in the video below.
Technical notes
The easiest way to create a spiral is to wind a copper wire onto a cylindrical object (e.g. a pencil).
When heating the spiral with the gas burner, wait until it becomes red hot, but do not keep it in the flame for long after that – a few seconds are sufficient. Otherwise some parts of the spiral can reach close to the melting point of copper (1085 °C) and the spiral can break, deform or melt.
Safety warning: It is absolutely necessary to use pliers when holding the spiral; under no circumstances can you hold it in your bare hands! Take exceptional care when working with the gas burner.
Pedagogical notes
If we do not have a gas burner available or simply do not want to show the second part of the experiment, we can of course reduce the experiment to just its first part (procedure points 1 and 2).
If we keep the spiral in the flame for a longer period of time (and the flame does not go out), the spiral will gradually heat up and its ability to transfer heat into its volume will decrease. The flame will then gradually grow back to its original size.
Students often explain the first part of the experiment with the argument that the spiral blocks the intake of air (oxygen) to the flame and therefore it fades; it increases again after the airflow is restored. This explanation is incorrect, but it has clear inner logic behind it and follows the findings students have at the moment. It should therefore be rewarded as such and we should clearly experimentally prove that the lack of oxygen is not the cause of the flame fading. The second part of this experiment (procedure points 3 and 4) can serve as such a proof – we are using a spiral that blocks air in absolutely the same way, but the flame does not decrease in intensity.
We can motivate the second part of the experiment by asking the students to design an experiment where the flame would not go out, or where heat would not dissipate from the flame to the spiral.
Expanding the experiment quantitatively
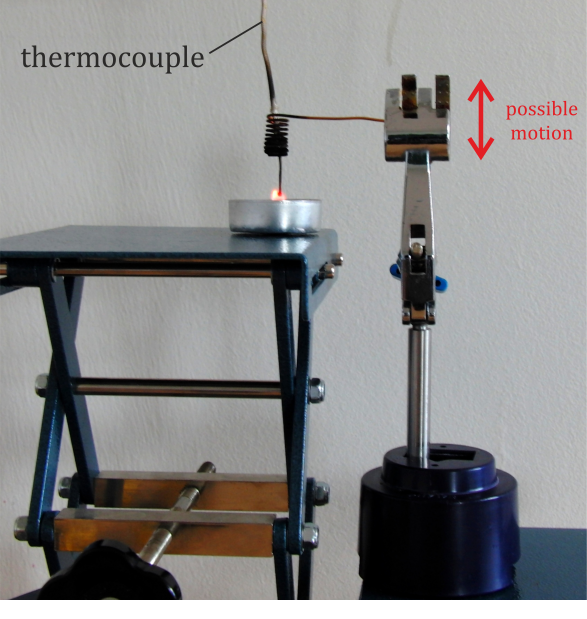
We can expand the experiment with a quantitative part which will prove the decrease in the temperature of the flame after putting in the spiral. The arrangement of such measurement is shown in Fig. 2. The candle and the thermocouple are fixated relatively to each other so that the sensor measures temperature in the hottest part of the flame. The adjustable part in this experiment is the spiral, which can move up or down; the thermocouple goes through its centre.
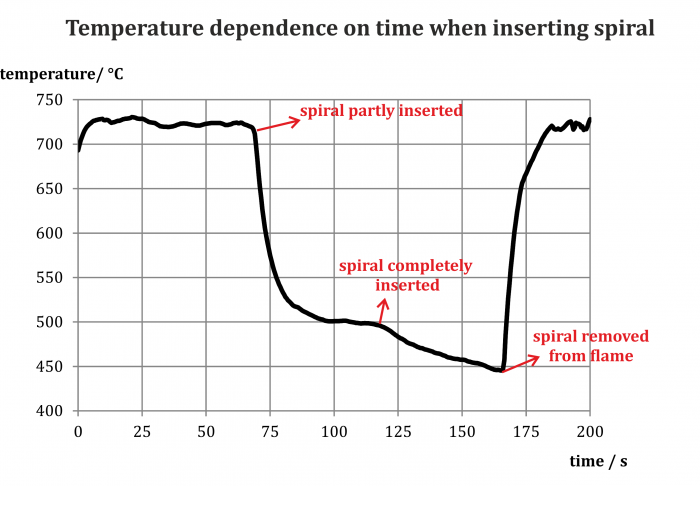
The chart in Fig. 3 shows the development of measured temperature while inserting the spiral on the flame. We can see that even a partial insertion decreased the measured temperature by more than 200 °C, full insertion then by another approx. 50 °C. The temperature of the flame quickly returned to its original values after removing the spiral.
Note: We need to take into account that the size of the flame also changes, so we are not always measuring in its hottest spot as we did at the beginning of the experiment.


